You’ve found the Visual Studio Code documentation GitHub repository, which contains the content for the Visual Studio Code documentation.
Topics submitted here will be published to the Visual Studio Code portal.
If you are looking for the VS Code product GitHub repository, you can find it here.
Note: The vscode-docs repository uses Git LFS (Large File Storage) for storing binary files such as images and .gifs. If you are contributing or updating images, please enable Git LFS per the instructions in the Contributing section below.
VS Code is a lightweight source code editor and powerful development environment for building and debugging modern web, mobile, and cloud applications. It is free and available on your favorite platform – Linux, macOS, and Windows.
If you landed here looking for other information about VS Code, head over to our website for additional information.
Feedback
If you want to give documentation feedback, please use the feedback control located at the bottom of each documentation page.
Documentation Issues
To enter documentation bugs, please create a new GitHub issue. Please check if there is an existing issue first.
If you think the issue is with the VS Code product itself, please enter issues in the VS Code product repo here.
Contributing
To contribute new topics/information or make changes to existing documentation, please read the Contributing Guideline.
Workflow
The two suggested workflows are:
For small changes, use the “Edit” button on each page to edit the Markdown file directly on GitHub.
If you plan to make significant changes or preview the Markdown files in VS Code, clone the repo to edit and preview the files directly in VS Code.
Publishing merged pull requests is not automatic and is initiated manually after changes have been reviewed on an internal staging server. There is no specific time guarantee for when PR updates will be available on https://code.visualstudio.com but the intent is that they will usually be live within 24 hours.
Okay, so I’ve gone and scrapped version 1 & version 2, simply because the ultimate goal behind
ToolKitMin is to offer a set of tools, not necessarily a framework per-say, but rather s library.
You can think of ToolKitMin as a library to aid the development of front end application
development. ToolKitMin is a powerful tool for beginners to learn, as it includes some of the
following:
Components
Simplistic template engine
State(s)
Queries
In memory
Services (aka AJAX)
Storage controller
ETC.
Here’s an example of some code…
varapp=ToolKit;app.DOM.ready(function(){console.log(app);app.Session.set('user_id',{user_id : 1});console.log(app.Session.get('user_id'));// Query demo.varqueryString="age GTE 20";varqueryCols=["age","name"];varqueryData=[{"age" : "30","name" :"Jack"},{"age" : "20","name" :"Jay"},{"age" : "12","name" :"Stacy"}];app.Query.setColumns(queryCols);app.Query.setTable(queryData);app.Query.select(queryString);app.Query.onComplete(function(records){console.log('Complete query');console.log(records);});// AJAX demo.app.Service({url: window.location.href,method: "GET",success: function(data){console.log(data);app.Query.exe();}});// Component demo.window.appState={name: 'Will I Am'};varcomponent={name: 'demo',state: window.appState,root: app.Utils.$one("body"),template: '<h1><% data.name %></h1>',onStateChange: function(){console.log("State changed!");},onRender : function(){console.log("Rendered!");}};app.Component.registerComponent(component);app.Router.add(/home/,function(){console.log('Home page.');});app.Router.add(/about/,function(){console.log('About page');});app.Router.add(function(){console.log('404 Error?!');});});// Wait 2 seconds to see the component update.setTimeout(function(){window.appState.name="Will Smith";},2000);// Test the router.setTimeout(function(){app.Router.navigate('home');},1000);setTimeout(function(){app.Router.navigate('about');},2000);setTimeout(function(){app.Router.navigate('404test');},3000);
ToolKitMin is what the name may imply, it’s a set of tools that have been gathered together, only a
lot of the tool(s) have been stripped to their core, making sure that ToolKitMin-JS stays as
lightweight as possible, whilst delivering plenty of functionality.
Todo
Update documentation & whatnot!
Features
Service
Component
Utils
Query
Router
Template Engine
Others
DOM
log
Session
Store
Service
The service method is simply ToolKit’s implementation of ajax.
Component
This implements a template which handles some DHTML template via the template engine,
it also handles its own state which can be manipulated outside of the component, like in the example.
Finally it can dispatch it’s own controller’s via making use of the ‘onRender’ property/function.
Utils
This is just a name space for useful/simple methods, not much more to it than that.
Query
This allows you to execute a ‘query’ over an array of objects, it runs via making use of a callback to
ensure that the main execution thread is never blocked by iterating over a large data-set.
Router
Allows you to have different URL’s within the front end, allowing for an SPA, currently it
only allows for hash based URL’s, and it does not monitor URL changes by default, i.e. user
tries to navigate to a different URL. Although such a feature is so simplistic that I believe it
could be down to the developer(s) decision whether or not to implement such a feature, after all it is
mean to be lightweight.
Template Engine
Currently it makes use of a template engine somewhat similar to EJS, although much smaller
minimal and simplistic.
Others
These are just simple tools that can be used if necessary or not.
DOM
Namespace for DOM related features.
log
Simply console.log, although it requires dev-mode to be set to true.
Session
Allows you to store data into a user’s session, aka a cover over session storage.
Chartopia is a Kotlin/Compose Multiplatform library that provides a variety of customizable charts to visually represent data.
Be sure to show your support by starring ⭐️ this repository, and feel free to contribute if you’re interested!
🌟 Features
🍩 DonutChart: A circular chart for visualizing proportional data, with smooth animations and extensive customization options. Add a list of segments to represent categories, making it perfect for percentages or distribution comparisons.
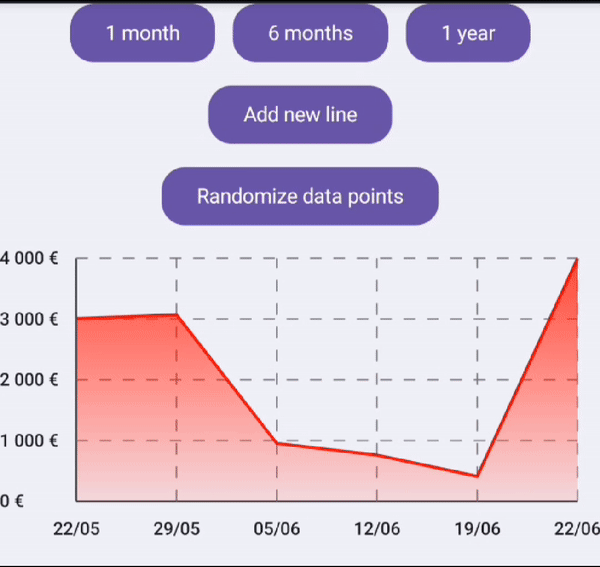
📈 LineChart: A versatile chart for displaying trends and patterns, fully customizable with animated transitions. Supports multiple lines on the same chart, enabling clear and effective comparisons of different datasets on shared axes.
🛠️ Installation
Add the dependency in your common module’s commonMain sourceSet:
In your settings.gradle.kts file, add Maven Central to your repositories:
repositories {
    mavenCentral()
}
Then add Chartopia dependency to your module:
With version catalog, open libs.versions.toml:
[versions]
chartopia ="2.0.0"// Check latest version
[libraries]
chartopia = { group ="io.github.tweener", name ="chartopia", version.ref ="chartopia" }
Then in your module build.gradle.kts add:
dependencies {
    implementation(libs.chartopia)
}
Without version catalog, in your module build.gradle.kts add:
dependencies {
val chartopia_version ="2.0.0"// Check latest version
implementation("io.github.tweener:chartopia:$chartopia_version")
}
The latest version is:
🧑💻 Usage
🍩 Donut chart
A DonutChart requires a list of Segments, with the first segment starting from the given startAngleFromOrigin in degrees.
Each segment is defined by an angle, its color and an optional progress option.
See .degrees to easily use float angles in degrees.
val green =Color(0xFF04C700)
val orange =Color(0xFFFF8850)
val red =Color(0xFFFF3434)
val darkRed =Color(0xFFA40000)
val yellow =Color(0xFFFFF534)
val darkYellow =Color(0xFF746F0E)
val blue =Color(0xFF3437FF)
DonutChart(
segments =listOf(
Segment(angle =40f.degrees, progress =0.33f, baseColor = green),
Segment(angle =20f.degrees, progress =0.7f, baseColor = yellow, backgroundColor = darkYellow),
Segment(angle =90f.degrees, progress =0.66f, baseColor = green),
Segment(angle =60f.degrees, progress =0.7f, baseColor = red, backgroundColor = darkRed),
Segment(angle =50f.degrees, progress =0.8f, baseColor = orange),
Segment(angle =100f.degrees, progress =1f, baseColor = blue),
),
startAngleFromOrigin =270f.degrees,
sizes =DonutChartDefault.chartSizes(strokeWidth =12.dp, selectedStrokeWidth =22.dp),
animationDurationMillis =800,
)
This code gives the following output:
📈 Line chart
A LineChart is a versatile chart used to visualize data points connected by straight or curved lines. It is ideal for displaying trends, relationships, or changes over time.
You have been approached by a company that is studying human bahavior. Your task is to give them a webcam, that can detect the motion or any movement in front of it. This should return a graph, this graph should contain for how long the human/object was in front of the camera.
Solution Logic :
Additional Python Libraries Required :
OpenCV
pip install opencv-python
Pandas
pip install pandas
Bokeh
pip install bokeh
Analysis of all Windows :
After running the code there 4 new window will appear on screen.
1. Gray Frame:
In Gray frame the image is a bit blur and in grayscale we did so because, In gray pictures there is only one intensity value whereas in RGB(Red, Green and Blue) image thre are three intensity values. So it would be easy to calculate the intensity difference in grayscale.
2. Difference Frame:
Difference frame shows the difference of intensities of first frame to the current frame.
3. Threshold Frame:
If the intensity difference for a particular pixel is more than 30(in my code) then that pixel will be white and if the difference is less than 30 that pixel will be black.
4. Color Frame:
In this frame you can see the color images in color frame along with green contour around the moving objects.
Time Record of Movements :
The Time_of_movements file will be stored in the folder where your code file is stored. This file will be in csv extension. In this file the start time of motion and the end time of motion will be recorded.
Plotting Time Intervals :
Time Intervals will be plotted using Bokeh Plot. Bokeh is an interactive visualization library that targets modern web browsers for presentation. Here, the time intervals are collected by the csv file and then plotted using Bokeh. The green color shows that an object was under motion, time is displayed in milisecond(ms).
Usage :
The Repository contains 2 python files :
motion_detector.py :
It conatins the code for Motion Detection. By running this file you can detect the motion in front of webcam and can record the start and end time of motion.
plotting.py :
It makes use of Boken Library. By running this file you can plot the time intervals. This file imports the code of motion detection from motion_detector.py, so motion_detector.py needs to be in same directory.
This project will no longer be maintained by Intel.
Intel has ceased development and contributions including, but not limited to, maintenance, bug fixes, new releases, or updates, to this project.
Intel no longer accepts patches to this project.
If you have an ongoing need to use this project, are interested in independently developing it, or would like to maintain patches for the open source software community, please create your own fork of this project.
Intel(R) Machine Learning Scaling Library (Intel(R) MLSL) is a library providing
an efficient implementation of communication patterns used in deep learning.
- Built on top of MPI, allows for use of other communication libraries
- Optimized to drive scalability of communication patterns
- Works across various interconnects: Intel(R) Omni-Path Architecture,
  InfiniBand*, and Ethernet
- Common API to support Deep Learning frameworks (Caffe*, Theano*,
  Torch*, etc.)
Intel(R) MLSL package comprises the Intel MLSL Software Development Kit (SDK)
and the Intel(R) MPI Library Runtime components.
SOFTWARE SYSTEM REQUIREMENTS
This section describes the required software.
Operating Systems:
- Red Hat* Enterprise Linux* 6 or 7
- SuSE* Linux* Enterprise Server 12
- Ubuntu* 16
Compilers:
- GNU*: C, C++ 4.4.0 or higher
- Intel(R) C++ Compiler for Linux* OS 16.0 through 17.0 or higher
    $ make all
    $ [MLSL_INSTALL_PATH=/path] make install

By default MLSL_INSTALL_PATH=$PWD/_install
Binary releases are available on our release page.
Installing Intel(R) MLSL using RPM Package Manager (root mode):
1. Log in as root

2. Install the package:

    $ rpm -i intel-mlsl-devel-64-<version>.<update>-<package#>.x86_64.rpm

    where <version>.<update>-<package#> is a string, such as: 2017.0-009

3. Uninstalling Intel(R) MLSL using the RPM Package Manager

    $ rpm -e intel-mlsl-devel-64-<version>.<update>-<package#>.x86_64
Installing Intel(R) MLSL using the tar file (user mode):
    $ tar zxf l_mlsl-devel-64-<version>.<update>.<package#>.tgz
    $ cd l_mlsl_<version>.<update>.<package#>
    $ ./install.sh

There is no uninstall script. To uninstall Intel(R) MLSL, delete the
full directory you have installed the package into.
Launching Sample Application
The sample application needs python with the numpy package installed.
You can use [Intel Distribution for Python]
(https://software.intel.com/en-us/distribution-for-python), Anaconda,
or the python and numpy that comes with your OS.
Before you start using Intel(R) MLSL, make sure to set up the library environment.
Use the command:
$ source <install_dir>/intel64/bin/mlslvars.sh
$ cd <install_dir>/test
$ make run
If the test fails, look in the log files in the same directory.
Here <install_dir> is the Intel MLSL installation directory.
Migration to oneCCL
Intel® MLSL is no longer supported, no new releases are available. Please switch to the new API introduced in Intel® oneAPI Collective Communications Library (oneCCL)
There are some examples that can help you get started with oneCCL, simply try to perform the following:
$ cd ./mlsl_to_ccl
$ . ${MLSL_ROOT}/intel64/bin/mlslvars.sh
$ . ${CCL_ROOT}/env/vars.sh
$ make run -f Makefile
If you used MLSL before, here is an example that demonstrates the key differences between libraries’ APIs.
#include <iostream>#include <stdio.h>- #include "mlsl.hpp"+ #include "ccl.hpp"- using namespace MLSL;+ using namespace ccl;#define COUNT 128
int main(int argc, char** argv)
{
int i, size, rank;
auto sendbuf = new float[COUNT];
auto recvbuf = new float[COUNT];
- Environment::GetEnv().Init(&argc, &argv);- rank = Environment::GetEnv().GetProcessIdx();- size = Environment::GetEnv().GetProcessCount(); - auto dist = Environment::GetEnv().CreateDistribution(size, 1);+ auto stream = environment::instance().create_stream();+ auto comm = environment::instance().create_communicator();+ rank = comm->rank();+ size = comm->size();
/* initialize sendbuf */
for (i = 0; i < COUNT; i++)
sendbuf[i] = rank;
/* invoke allreduce */
- auto req = dist->AllReduce(sendbuf, recvbuf, COUNT, - DT_FLOAT, RT_SUM, GT_GLOBAL);- Environment::GetEnv().Wait(req);+ comm->allreduce(sendbuf, recvbuf, COUNT,+ reduction::sum,+ nullptr /* coll_attr */,+ stream)->wait();
/* check correctness of recvbuf */
float expected = (size - 1) * ((float)size / 2);
for (i = 0; i < COUNT; i++)
{
if (recvbuf[i] != expected)
{
std::cout << "idx " << i
<< ": got " << recvbuf[i]
<< " but expected " << expected
<< std::endl;
break;
}
}
if (i == COUNT && rank == 0)
std::cout << "PASSED" << std::endl;
- Environment::GetEnv().DeleteDistribution(dist);- Environment::GetEnv().Finalize();
delete[] sendbuf;
delete[] recvbuf;
return 0;
}
Intel’s compilers may or may not optimize to the same degree for non-Intel
microprocessors for optimizations that are not unique to Intel microprocessors.
These optimizations include SSE2, SSE3, and SSSE3 instruction sets and other
optimizations. Intel does not guarantee the availability, functionality, or
effectiveness of any optimization on microprocessors not manufactured by Intel.
Microprocessor-dependent optimizations in this product are intended for use
with Intel microprocessors. Certain optimizations not specific to Intel
microarchitecture are reserved for Intel microprocessors. Please refer to the
applicable product User and Reference Guides for more information regarding the
specific instruction sets covered by this notice.
Notice revision #20110804
*Other names and brands may be claimed as the property of others.
Do you love Pelican?
Can’t get enough of that Jekyll?
Then Nēnē is probably not for you.
Static website generators seem to be the favourite pastime of developers
procrastinating on other more important projects.
So of course, I had to make my own!
When I say no-frills, I mean it. Nēnē has no built-in templates, no special
provisions for blogging, plugins, or the sort of thing that would be useful if
you just want to start a website.
But it also tries to combine several nice features from other generators into
something that will appeal to those who want to build their own templates.
Trivia:Nēnē continues the long tradition of naming static site
generators built in Python after birds (the nēnē is a
goose endemic to Hawai’i).
Documentation
Install instructions and other information can be found in the preliminary
documentation website (built with Nēnē, of course):
nene.leouieda.com
Looking for an example? Checkout these websites built with Nēnē:
This is an Asynchronous Job Queue system that relies on NATS JetStream for storage and general job life cycle management.
It is compatible with any NATS JetStream based system like a private hosted JetStream, Choria Streams or a commercial SaaS.
Each Task is stored in JetStream by a unique ID and Work Queue item is made referencing that Task. JetStream will handle
dealing with scheduling, retries, acknowledgements and more of the Work Queue item. The stored Task will be updated
during the lifecycle.
Multiple processes can process jobs concurrently, thus job processing is both horizontally and vertically scalable. Job
handlers are implemented in Go with one process hosting one or many handlers. Other languages can implement Job Handlers using
NATS Request-Reply services. Per process concurrency and overall per-queue concurrency controls exist.
This is a brand-new project, under heavy development. The core Task handling is in good shape and reasonably stable. Task Scheduler is still subject to some change.
Synopsis
Tasks are published to Work Queues:
// establish a connection to the EMAIL work queue using a NATS contextclient, _:=asyncjobs.NewClient(asyncjobs.NatsConn(nc), asyncjobs.BindWorkQueue("EMAIL"))
// create a task with the type 'email:new' and body from newEmail()task, _:=asyncjobs.NewTask("email:new", newEmail())
// store it in the Work Queueclient.EnqueueTask(ctx, task)
Tasks are processes by horizontally and vertically scalable processes. Typically, a Handler handles one type of Task. We have Prometheus
integration, concurrency and backoffs configured.
// establish a connection to the EMAIL work queue using a // NATS context, with concurrency, prometheus stats and backoffclient, _:=asyncjobs.NewClient(
asyncjobs.NatsContext("EMAIL"),
asyncjobs.BindWorkQueue("EMAIL"),
asyncjobs.ClientConcurrency(10),
asyncjobs.PrometheusListenPort(8080),
asyncjobs.RetryBackoffPolicy(asyncjobs.RetryLinearTenMinutes))
router:=asyncjobs.NewTaskRouter()
router.Handler("email:new", func(ctx context.Context, log asyncjobs.Logger, task*asyncjobs.Task) (any, error) {
log.Printf("Processing task %s", task.ID)
// do work here using task.Payloadreturn"sent", nil
})
client.Run(ctx, router)
See our documentation for a deep dive into the use cases, architecture, abilities and more.
Requirements
NATS 2.8.0 or newer with JetStream enabled.
Features
See the Feature List page for a full feature break down.
A Server Technology for Realtime Object Networking
Astron is an open-source, distributed server suite particularly well-suited for powering MMO games.
The design is inspired by a similar unrelated project developed at the Disney Interactive Media
Group, and used in-house from 2001 until 2013.
The suite consists of many components, which handle separate tasks in order to distribute
the workload of managing a multi-sharded game/application environment with many objects and clients.
Overview
Objects
The core concept in an Astron environment is a DistributedObject. These represent individual game
objects that clients may know of and/or control. Every DistributedObject (or “DO” for short) contains
one or more “fields” – simple properties, like the position or appearance of an object – which may be
“updated” periodically. DOs are hierarchical: Each DO contains many “zones” (unsigned 32-bit integers)
which can contain child DOs. This makes up the basis of the visibility system.
Visibility System
As stated before, every DO lives beneath a parent, with the exception of the root object. If a client
can see a DO, it may request to be informed of objects beneath that object within a zone.
It will continue to be informed of objects (and their updates) as long as the request remains active.
Such a request is called interest.
DC Files
DC files (short for “distributed class” files) are the core protocol description for a game built
upon Astron. A DC file is a pre-agreed list of dclasses (object types which may be created) and
fields for each one. The ordering in a DC file is used to convert the human-readable dclass/field
names to 16-bit numbers which may be efficiently sent on the network. Because all components in the
Astron server use the same DC file, the 16-bit IDs can be converted back to the original fields as
requested.
In addition, every field in a DC file may contain one or more keywords. These describe the proper
routing/behavior of a field update as it passes through the Astron cluster.
Some keywords are listed below:
Persistence
ram
The field contains some information that should persist short term.
If the object is disabled, the information will be lost.
requiredimplies ram
This field must be present at all times. The server will interpret this to mean that the
field’s value is fundamental to the existence of the object. Therefore, an object must be given
required values on creation, and required values will reset to defaults when individually cleared.
The field is included in all object snapshots to the AI, and all snapshots to the client if it is
also visible to the client through ownrecv or clrecv.
db
The field contains some information that should persist long-term. If the object exists in a
database, the database will remember updates to this field and restore them on object activation.
Publication | Subscription
airecv
Any updates on this field should be sent to the object’s managing AI.
ownrecv
Objects may be “owned” by a client.
This owner may change the object’s parent and zone at will (unless disabled by the ClientAgent).
The owner should receive this field when it gains ownership of the object.
Additionally, any updates on this field should be sent to the object’s owner.
clrecv
The client should receive this field when the object becomes visible to the client.
broadcastimplies clrecv
Any updates on this field should be sent to all clients that can see the object.
ownsend
Objects may be “owned” by a client.
A client is allowed to update this field if it owns the object.
clsend
All clients that can see the object are allowed to update this field.
Application-specific components
The Astron server is only an environment for keeping track of clients and game objects. The behavior
of most of these game objects is not the concern of Astron. Rather, there are application-specific
components that a developer wishing to use Astron must implement in order to update game behavior.
The first, and most obvious, component that a developer must provide is a client. Clients are
participants in an Astron world. The client can connect to the server and communicate with objects
(in games: usually an avatar) and has limited control over those objects.
The client can then use that object to interact with the rest of the application.
The second component is an implementation of the applications’s sharding logic. In Astron terminology,
this is known as an AI server. An AI server has complete control over all objects in its shard.
It may create objects and perform privileged updates on them.
The third component is similar to an AI, but manages game-global objects. We call this an UberDOG,
or UD for short. An UberDOG is allowed to create and manage DistributedObjectGlobals, which are
unique in that they have no defined place within the visibility graph.
Instead, a DistributedObjectGlobal’s existence is hard-coded into all clients. There is no dynamic
discovery mechanism for DOGs, nor can they have any persistent fields on them.
DOGs are primarily used for RPC-like operations. For most Distributed Objects, interaction is prohibited
to unauthenticated clients. UberDOGs can be additionally configured to allow these clients to interact with
them. It is typical to use such an UberDOG to handle Authentication, but it can also be used to provide a
public RPC-based API to anonymous users.
Each component may have its own perspective onto a DO. This allows different logic to exist, for
the same object, for the client, AI, and UD. The perspectives are distinguished by a conventional notation:
If the perspective is intended to represent a DO on a client, no suffix is used.
If the perspective is intended to represent the DO on an AI or UD, the object’s name is suffixed with “AI” or “UD”, respectively.
For example, if a developer wished to create an object called a DistributedMonkey, the following classes may exist in the game code:
DistributedMonkey: The client-side representation of the object, which handles rendering and sound output.
DistributedMonkeyOV: The client-side owner-view representation of the object. It is like an ai representation of the object, except that it handles fields marked ownrecv instead of fields marked airecv.
DistributedMonkeyAI: The AI-side representation of the object. This contains all server-side logic. For example, the monkey’s movement and feeding behaviors.
DistributedMonkeyUD: An UD-side representation of the object. For game objects like this, an UD representation is rarely needed, but can be useful if an UberDOG needs to know of certain events that happen on this game object.
For DistributedObjectGlobals, the scheme works slightly differently. A DOG is used in cases where some RPC functionality is needed from the gameserver.
For example, if you wanted to create a mechanism where players could redeem scratch code cards for in-game currency, you might create a ScratchCardManager, which would inherit from DistributedObjectGlobal.
The ScratchCardManager would have the following two representations:
ScratchCardManagerUD: The UD-side representation of the object. The object’s doId is hard coded.
ScratchCardManager: The client-side representation of the same. The client would be aware of this object because the object type and ID would be hard-coded into the code. The client can send updates on this object to request to redeem codes.
Astron Roles
Within the Astron cluster, Astron daemons are configured to serve certain roles in the cluster. Astron daemons may serve one or more roles. Here we describe some of them in loose detail:
Message Director
The message director receives messages from other daemons, and routes them. A “message” is just an atomic blob, with a maximum size of approximately 64kB, sent from one daemon to another. The routing is performed by means of routing identifiers called channels, where a message contains any number of destination channels, and most messages include a source channel. Each component tells the MD which channels it would like to subscribe to, and receives messages sent to its subscribed channels. In this manner, the messaging architecture of Astron is actually a very simple publish-subscribe system. The message director is the simplest component of Astron.
Client Agent
The client agent handles communication with the game client. Game clients do not directly communicate with Astron. Rather, they communicate with the client agent, which in turn communicates with Astron. Most of the security is implemented in the client agent, which enforces the clsend and ownsend keyword restrictions. For example, if a client tries to update a field that is not marked clsend, or ownsend on an object it controls, the client agent will automatically disconnect the client and log a security violation. Since the client agent may have game-specific code, Astron provides a very simple reference implementation. You may want to subclass this base implementation to implement certain game-specific logic, such as allowing clients to create their own avatars directly, without relying on an UberDOG.
State Server
The state server manages the short-term state of all DistributedObjects. It stores information such as what type of object it is, what its object ID is, and where it’s located within the visibility tree. It is also responsible for persisting the value of “ram” fields. Other components may communicate with the state server to manipulate the object, query the object’s state, and query the existence of all objects in a given location.
Database Server
The database server handles long term persistence of “db” fields. It stores these fields in a database of some sort, and can update them, or retrieve their value.
Database-State Server
This is a specialized State Server for tracking the short-term state of objects that exist in the database. A DB-SS behaves exactly the same as a State Server, however, it also listens for updates to “db”-keyworded fields and informs the database of the change.
In addition, a DB-SS listens on the entire range of object IDs that it manages. If it sees a location update for an object in its range, it will automatically fetch the object out of the database and convert it into a state-server-object.
@Kestred Kevin Stenerson is the project maintainer and one of its architects. He does Astron maintenance (bugfixes, binary-distributions, etc), design revisions, new feature planning & implementation, architecture scalability, and application/network interface cleanliness.
@CFSworks Sam Edwards is the project author and the original and continuing architect. He provides guidance on the organization of the code and system architecture. He also works on major rewrites, architecture scalability, bugfixes, and efficiency improvements.
@AlJaMa Alex Mault is a bouncing board for architectural design and problem solving. He works with OS X support, feature brainstorming, and some libastron design and implementation.
Major Contributors
@MMavipc Maverick Mosher wrote a great deal of code to help get Astron out of its infancy.
@jjkoletar Jeremy Koletar was key in Astron’s early inspiration and initial design; he also works on bug fixes.
License
The Astron project is currently available under the Modified BSD license (BSD 3-Clause). The terms of this license are available in the “LICENSE.md” file of this archive.
Contributing
We welcome any potential contributors! Don’t just start coding though; we all talk about what we’re doing, what is next, etc. on IRC.
Please come in and tell us what you’d like to do, or ask what we could use help on.
Join us at: #Astron on irc.freenode.net
OTP Architecture resources
There are a lot of resources we use as a guide and for inspiration while building Astron. New contributors might find them to be very informative, both about how the server works and in thinking about what direction Astron wants to go in. NOTE – These materials are about the original OTP server at Disney, and only used for inspiration here.
This is a job queueing system based on RabbitMQ as used in in AppMail, MyOps and other apps I’ve been working on.
Installation
gem'jobster'
Queueing & writing jobs
To create a class for the job that you wish to run in the background. This class should inherit from Jobster::Job.
classYourJob < Jobster::Jobdefperformid#=> The job's IDparams#=> Any parameters that are provided when the job is queued# Do your bits here...endend
Whenever you wish to queue the job, you can do so by calling queue on the class and providing the name of the queue and any parameters needed to run the job.
YourJob.queue(:main,:param1=>'Some parameter')
Delaying jobs
You can queue jobs to run in the future. These jobs will be added to the delay exchange (config.delay_exchange_name) and then moved into your active exchange when they are due to be run. You simply provide the number of seconds to wait from now before the job should be executed.
You need to create a jobster worker config file. For a Rails application, it might look like this.
# Require your Rails environmentrequire_relative'environment'# Set up which queues you wish this worker to joinJobster::Worker.queues << :web_hooksJobster::Worker.queues << :mail_sending
You’ll also need to run one or more workers to actually process your jobs. Just run jobster followed by the path to your configuration file as the -C option.
$ jobster -c config/jobster.rb
You can pass a list of queues to subscribe to by providing -q (or --queues) to the jobster command. These should be comma separated.
Configuration
You should also ensure to configure Jobster to suit your environment:
Jobster.configuredo |c|
# Provide a Bunny instance for your RabbitMQ connection.c.bunny=YourApp.bunny# Set the name of the exchange that jobs should be published toc.exchange_name='your-app-name'# Set a logger for use by Jobsterc.logger=Logger.new(Rails.root.join('log','jobster.log'))# Set the number of threads to run in each worker (default: 2)c.worker_threads=4end
Handling errors
To handle errors which are raised in your worker, it’s best to register and error handler in your worker config file. For example, if you use sentry, you might do this.
You can register callbacks which can be executed throughout your worker lifecycle. You can register a callback to a worker like so:
Jobster.configuredo |c|
c.worker_callback:before_jobdo |job|
# Runs before a job is runendend
The follow additional callbacks can be registered:
after_start – called just after the worker has started before registering with any queues
before_queue_join(queue_name) – called before a queue is joined
after_queue_join(queue_name, consumer) – called after a queue is joined
before_job(job) – called before a job is performed
after_job(job, exception) – called after a job has been run. The exception argument will be nil if the job completed successfully.
before_quit(type) – called before the worker quites (type is the type of exit – immediate, job_completed, timeout)
In the before_job callback, you can raise a Jobster::Job::Abort exception to halt the execution of the job.
Inline job queueing
If you have a simple method that you wish to queue without creating a full Job klass, you can do so using the __background__ method. For example:
# Create a method that can be run in the background
class User
  def self.expire_tokens(options = {})
    # Do something here
  end
end

# Queue it...
job_id = User.__background__.expire_tokens(:date => 2.weeks.ago)


 https://github.com/microsoft/vscode-docs