MIT License

Copyright (c) 2021 zhbi98

Permission is hereby granted, free of charge, to any person obtaining a
copy of this software and associated documentation files (the "Software"),
to deal in the Software without restriction, including without limitation
the rights to use, copy, modify, merge, publish, distribute, sublicense,
and/or sell copies of the Software, and to permit persons to whom the
Software is furnished to do so, subject to the following conditions:

The above copyright notice and this permission notice shall be included in
all copies or substantial portions of the Software.

THE SOFTWARE IS PROVIDED "AS IS", WITHOUT WARRANTY OF ANY KIND, EXPRESS OR
IMPLIED, INCLUDING BUT NOT LIMITED TO THE WARRANTIES OF MERCHANTABILITY,
FITNESS FOR A PARTICULAR PURPOSE AND NONINFRINGEMENT. IN NO EVENT SHALL THE
AUTHORS OR COPYRIGHT HOLDERS BE LIABLE FOR ANY CLAIM, DAMAGES OR OTHER
LIABILITY, WHETHER IN AN ACTION OF CONTRACT, TORT OR OTHERWISE, ARISING
FROM, OUT OF OR IN CONNECTION WITH THE SOFTWARE OR THE USE OR OTHER
DEALINGS IN THE SOFTWARE.
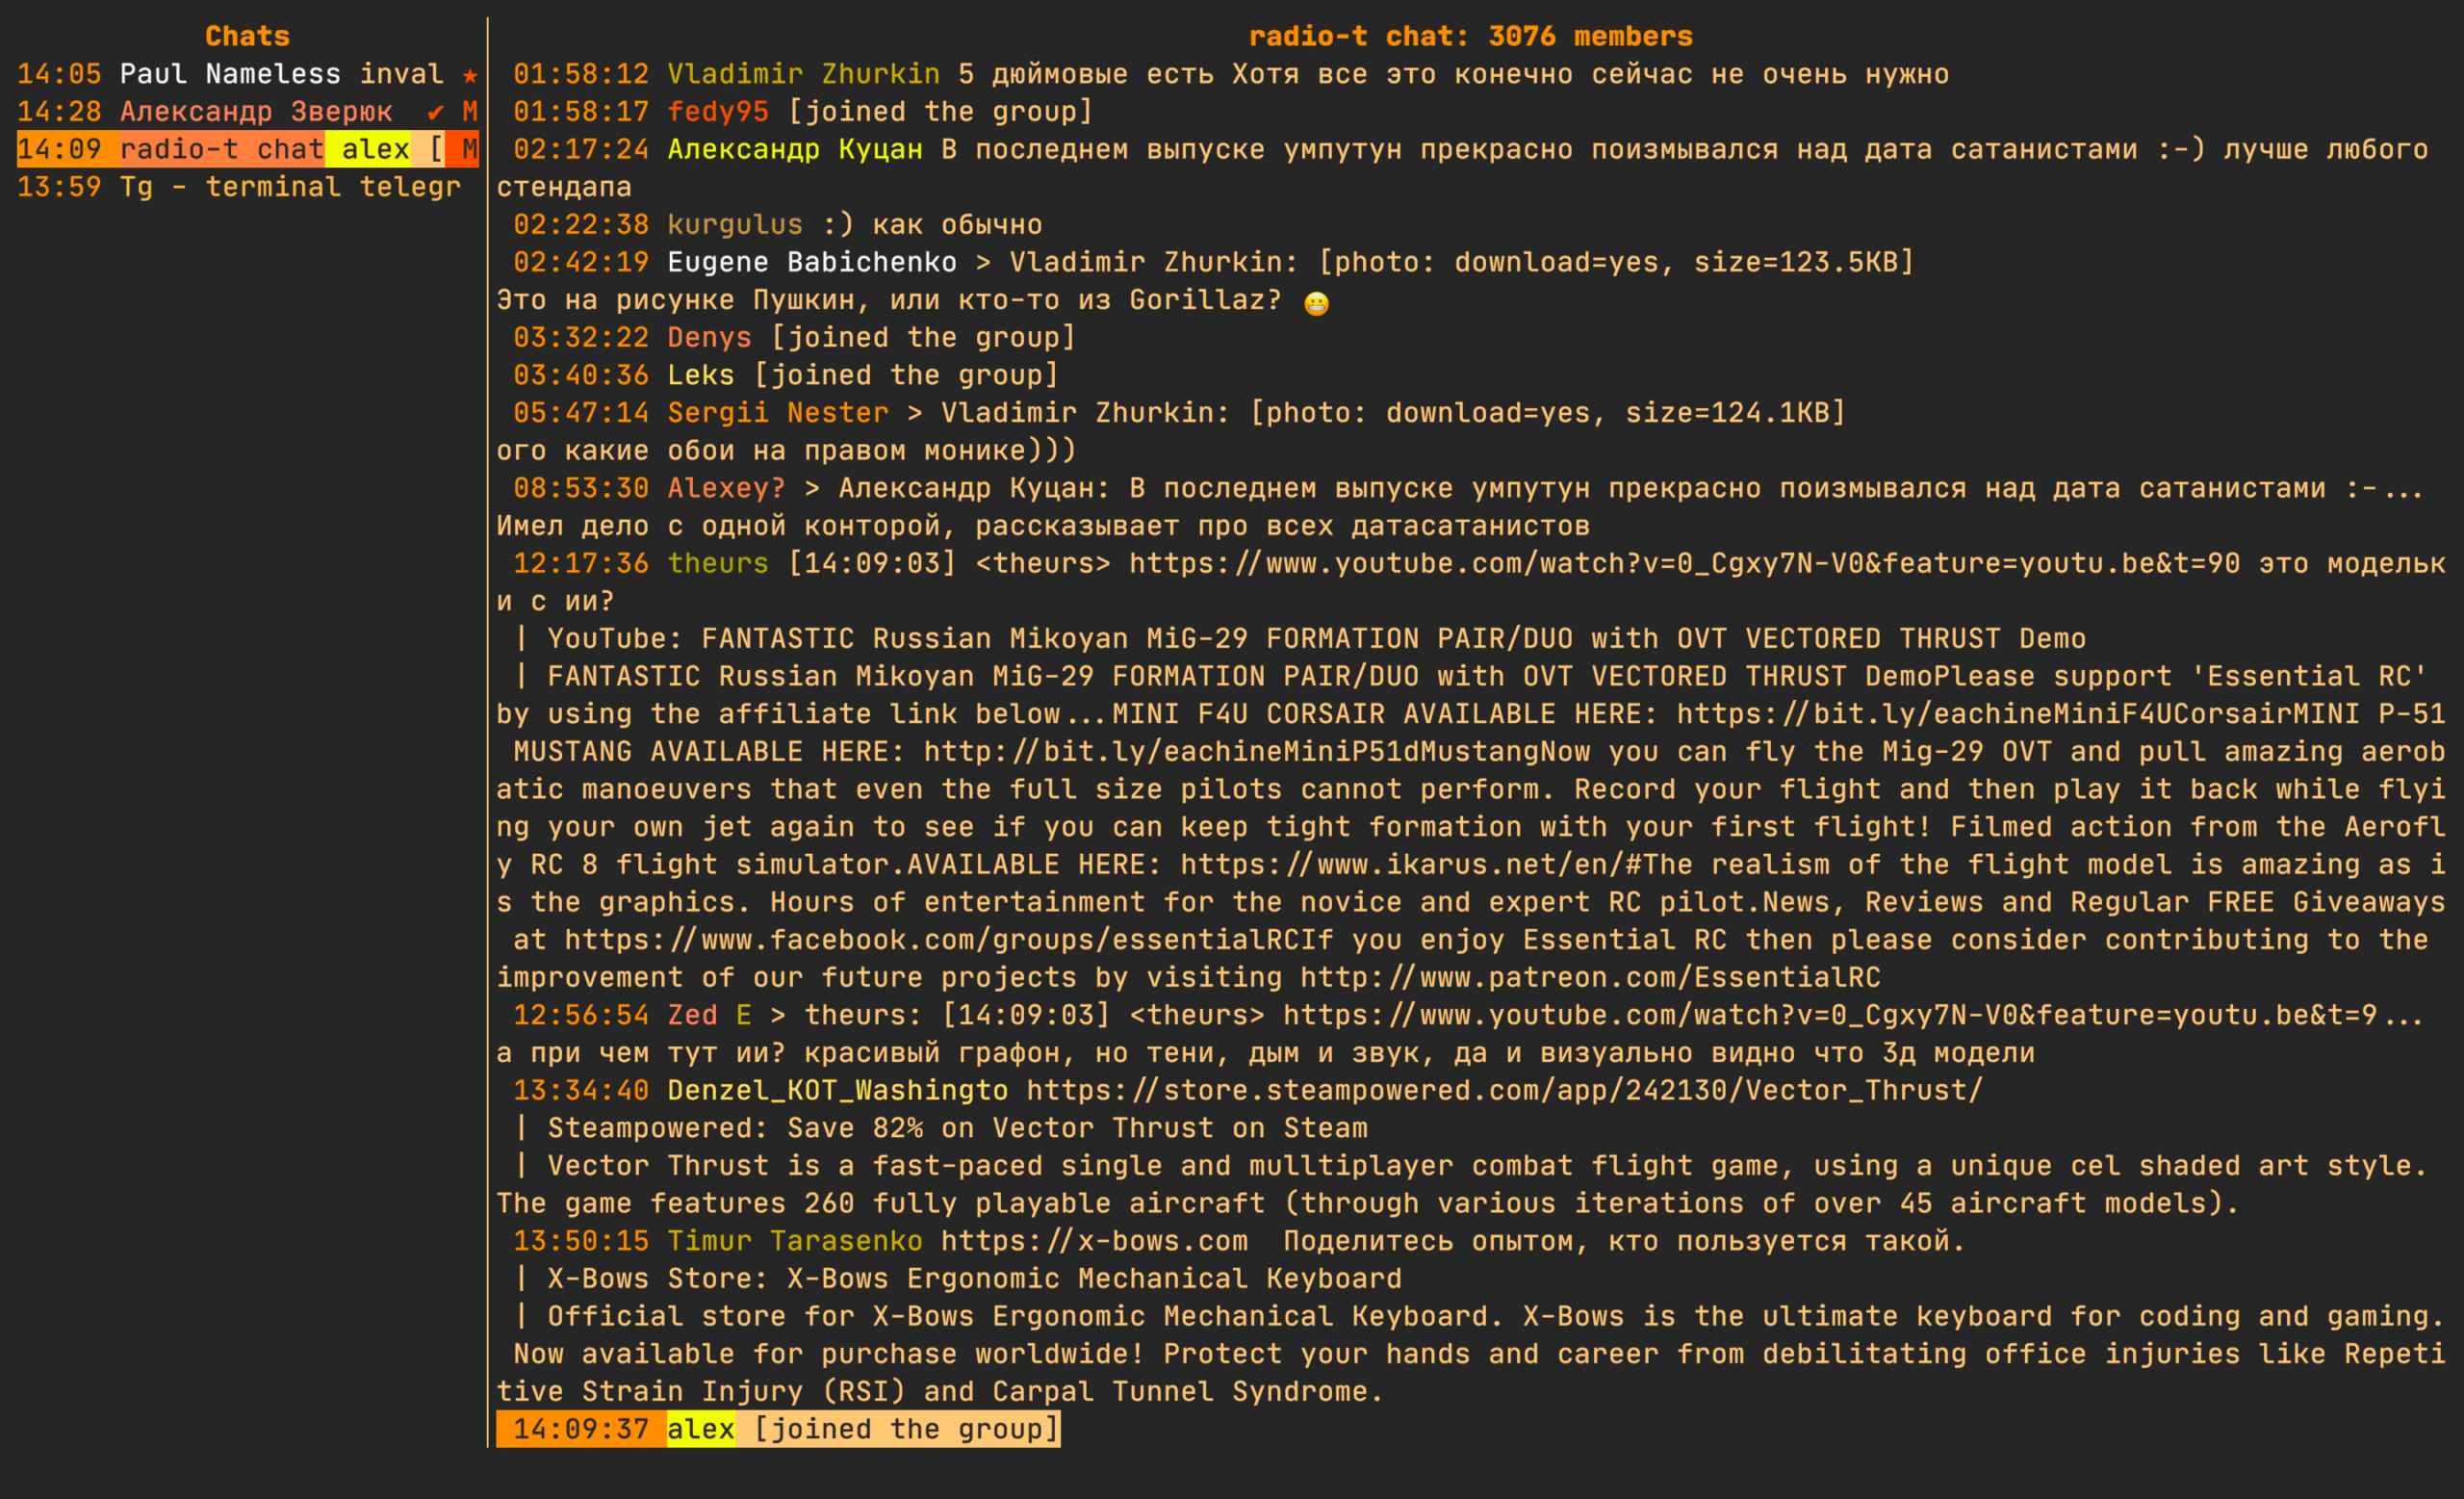
terminal-notifier – for Mac (used by default). You can change it to dunst for Linux or any other notifications program (see NOTIFY_CMD in configuration)
importos# You can write anything you want here, file will be executed at start time# You can keep you sensitive information in password managers or gpg# encrypted files for exampledefget_pass(key):
# retrieves key from password storereturnos.popen("pass show {} | head -n 1".format(key)).read().strip()
PHONE=get_pass("i/telegram-phone")
# encrypt you local tdlib database with the keyENC_KEY=get_pass("i/telegram-enc-key")
# log level for debugging, info by defaultLOG_LEVEL="DEBUG"# path where logs will be stored (all.log and error.log)LOG_PATH=os.path.expanduser("~/.local/share/tg/")
# If you have problems with tdlib shipped with the client, you can install and# use your own, for example:TDLIB_PATH="/usr/local/Cellar/tdlib/1.6.0/lib/libtdjson.dylib"# you can use any other notification cmd, it is simple python string which# can format title, msg, subtitle and icon_path paramters# In these exapmle, kitty terminal is used and when notification is pressed# it will focus on the tab of running tgNOTIFY_CMD="/usr/local/bin/terminal-notifier -title {title} -subtitle {subtitle} -message {msg} -appIcon {icon_path} -sound default -execute '/Applications/kitty.app/Contents/MacOS/kitty @ --to unix:/tmp/kitty focus-tab --no-response -m title:tg'"# You can use your own voice recording cmd but it's better to use default one.# The voice note must be encoded with the Opus codec, and stored inside an OGG# container. Voice notes can have only a single audio channel.VOICE_RECORD_CMD="ffmpeg -f avfoundation -i ':0' -c:a libopus -b:a 32k {file_path}"# You can customize chat and msg flags however you want.# By default words will be used for readability, but you can make# it as simple as one letter flags like in mutt or add emojiesCHAT_FLAGS= {
"online": "●",
"pinned": "P",
"muted": "M",
# chat is marked as unread"unread": "U",
# last msg haven't been seen by recipient"unseen": "✓",
"secret": "🔒",
"seen": "✓✓", # leave empty if you don't want to see it
}
MSG_FLAGS= {
"selected": "*",
"forwarded": "F",
"new": "N",
"unseen": "U",
"edited": "E",
"pending": "...",
"failed": "💩",
"seen": "✓✓", # leave empty if you don't want to see it
}
# use this app to open url when there are multipleURL_VIEW='urlview'# Specifies range of colors to use for drawing users with# different colors# this one uses base 16 colors which should look good by defaultUSERS_COLORS=tuple(range(2, 16))
# to use 256 colors, set range appropriately# though 233 looks better, because last colors are black and gray# USERS_COLORS = tuple(range(233))# to make one color for all users# USERS_COLORS = (4,)# cleanup cache# Values: N days, None (never)KEEP_MEDIA=7FILE_PICKER_CMD="ranger --choosefile={file_path}"# FILE_PICKER_CMD = "nnn -p {file_path}"MAILCAP_FILE=os.path.expanduser("~/.config/mailcap")
DOWNLOAD_DIR=os.path.expanduser("~/Downloads/") # copy file to this dir
Mailcap file
Mailcap file is used for deciding how to open telegram files (docs, pics, voice notes, etc.). Path to the file can be overriden with MAILCAP_FILE in config file.
Example: ~/.mailcap
# media
video/*; mpv "%s"
audio/ogg; mpv --speed=1.33 "%s"
audio/mpeg; mpv --no-video "%s"
image/*; qview "%s"# text
text/html; w3m "%s"
text/html; open -a Firefox "%s"
text/plain; less "%s"# fallback to vim
text/*; vim "%s"
Keybindings
vi like keybindings are used in the project. Can be used commands like 4j – 4 lines down.
For navigation arrow keys also can be used.
Chats:
j,k: move up/down
J,K: move 10 chats up/down
g: go to top chat
l: open msgs of the chat
m: mute/unmute current chat
p: pin/unpin current chat
u: mark read/unread
r: read current chat
c: show list of contacts
dd: delete chat or remove history
ng: create new group chat
ns: create new secret chat
/: search in chats
?: show help
Msgs:
j,k: move up/down
J,K: move 10 msgs up/down
G: move to the last msg (at the bottom)
D: download file
l: if video, pics or audio then open app specified in mailcap file, for example:
# Images
image/png; qView "%s"
audio/*; mpv "%s"
if text, open in less (to view multiline msgs)
e: edit current msg
<space>: select msg and jump one msg down (use for deletion or forwarding)
<ctrl+space>: same as space but jumps one msg up
y: yank (copy) selected msgs with to internal buffer (for forwarding) and copy current msg text or path to file to clipboard
p: forward (paste) yanked (copied) msgs to current chat
dd: delete msg for everybody (multiple messages will be deleted if selected)
i or a: insert mode, type new message
I or A: open vim to write long msg and send
v: record and send voice message
r,R: reply to a current msg
S: calls a file picker
sv: send video
sa: send audio
sp: send picture
sd: send document
o: open url present in message (if multiple urls, urlview will be opened)
]: next chat
[: prev chat
u: show user info (username, bio, phone, etc.)
c: show chat info (e.g. secret chat encryption key, chat id, state, etc.)
Thank you for visiting this repo/poster. The code is in the process of reorganization and a little tidying. The poster is in the poster folder. I will issue a DOI and do a github release when the code is relatively acceptable. Please let me know if you have any questions. Thanks!
Session:
Novel Statistical Techniques in Archaeology II (QUANTARCH II) (Sponsored by SAA QUANTARCH Interest Group)
Title:
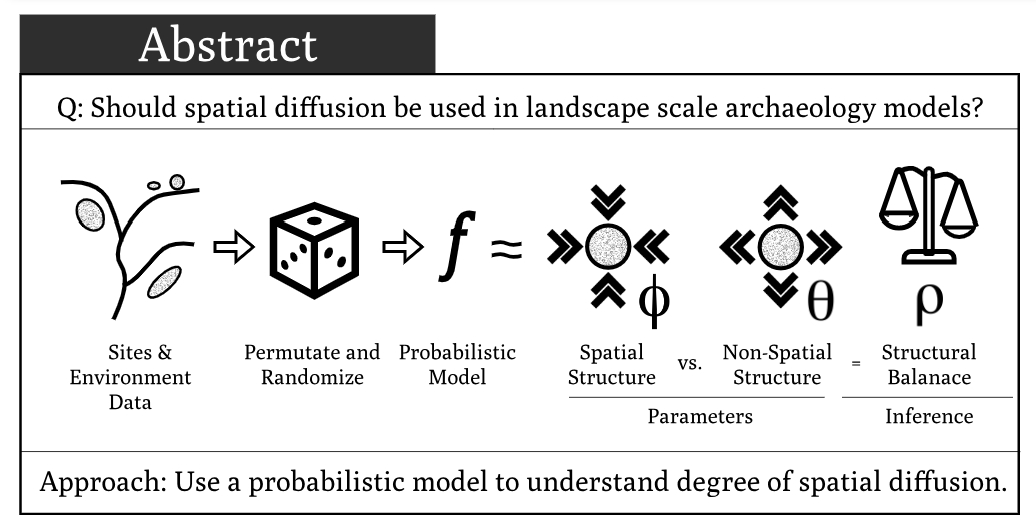
Estimating the Effect of Endogenous Spatial Dependency with a Hierarchical Bayesian ICAR Model on Archaeological Site Location Data
Authors:
Matthew Harris & Mary Lennon
Abstract:
This research presents a method to test the endogenous spatial correlation effect when modeling the landscape sensitivity for archaeological sites. The effects of endogenous spatial correlation are inferred using a Hierarchical Bayesian model with a Intrinsic Conditional Auto-Regressive (ICAR) component to better understand the importance of modeling spatial cultural process. In current practice, effects of endogenous spatial autocorrelation are rarely explicitly incorporated into quantitative archaeological predictive models. This is due in part to the difficulties of measuring how cultural process relate across space and time, as well as accepting the assumption that geographically near sites are implicitly more related than distant sites. Typically these difficulties are side-stepped by including aspects of cultural processes as features and ignoring endogenous spatial correlation by assuming sites are spatially independent phenomena. While there are benefits to this approach, aside from convenience, the validity of either of these assumptions has not previously been tested. The approach developed here leads to better understanding the penalty for assuming spatial independence and the development of methods to model spatial cultural process.
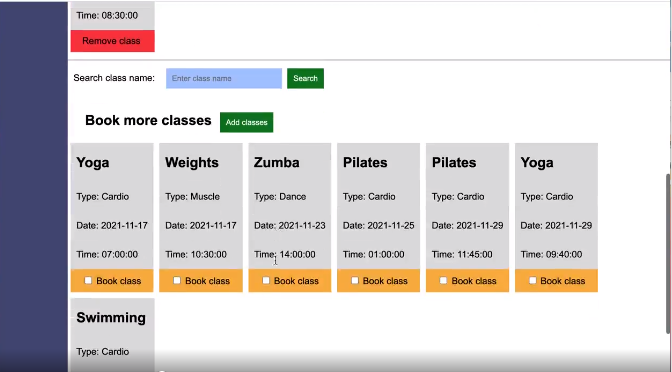
A local gym has asked you to build a piece of software to help them to manage memberships, and register members for classes.
MVP
The app should allow the gym to create and edit Members
The app should allow the gym to create and edit Classes
The app should allow the gym to book members on specific classes
The app should show a list of all upcoming classes
The app should show all members that are booked in for a particular class
Inspired By
Glofox, Pike13
Possible Extensions
Classes could have a maximum capacity, and users can only be added while there is space remaining.
The gym could be able to give its members Premium or Standard membership. Standard members can only be signed up for classes during off-peak hours.
The Gym could mark members and classes as active/deactivated. Deactivated members/classes will not appear when creating bookings.
Many WordPress developers long for features like Eloquent, Blade, Service Container, and Service Provider to help them build powerful plugins. Falcon is here to change the game and bring these capabilities to your fingertips.
Please note: This plugin provides a series of services and is not intended to be used as a base for creating new plugins.
Features
Powerful Service Container and Service Provider
Query Builder
Eloquent
Template Engine (Blade, Twig)
Logger (Monolog)
Email (PHPMailer)
Laravel Validation
Request Handling
Scheduler
Environment Management
Symfony Var-Dumper (dd, dump)
Carbon
Additional Helpers to develop your plugin fast.
Minimum PHP version: 8.2
Installation
Create Directory: In the wp-content folder, if the mu-plugins folder does not exist, create it. Place the falcon-base-services folder inside it.
Create Loader File: In the root of the mu-plugins folder, create a PHP file with a name of your choice and add the following code:
Note that the contents of the mu-plugins folder do not need to be activated in the WordPress admin and are executed before all other plugins. Also, WordPress does not scan the folders inside mu-plugins unless explicitly instructed.
Install Dependencies: Open the terminal in the falcon-base-services folder and run the following command:
composer install
If you haven’t installed Composer, you can download and install it from this link.
The plugin is now ready to use. Let’s explore its features and how to use them.
Maintenance Mode
If you need to put the site in maintenance mode, simply rename the maintenance.example.php file in the storage folder to maintenance.php. You can also edit the contents of the file as needed.
Environment Variables (ENV)
Items mentioned in the .env.example file are important. Rename the file to .env.
get
You can set your variables in the .env file and use them anywhere in your code like this:
$_ENV['item'];
//orenv('item')
set
To set an item in the global $_ENV var, you can use:
setEnv($key, $value);
Config
You can also use configuration files in your project that return an array.
Place the configuration file in the config folder and access the desired values using the falconConfig($file, $key = null, $folder_path = null) function.
$file: The name of the configuration file.
$key: The key of the requested array. If null, the entire file content is returned.
$folder_path: By default, the path to the configuration files is in the config folder. If you want to have new configurations in your project, you can also specify the path to the new folder.
Service Container – Service Provider
The plugin uses a powerful service container with autowiring capabilities.
Singleton Services: Register a singleton service using:
Resolving Methods: Resolve a method from a class using:
FALCON_CONTAINER->getMethod(Test::class, 'run');
This will automatically resolve any dependencies required by both the class and the method.
To create a service provider, create a class in the app/providers folder and extend the ServiceProvider class. Use the register and boot methods as needed. Then, add the provider’s address in the providers.php file located in the bootstrap folder.
Eloquent, QueryBuilder
All default WordPress tables are available as models in the app/Model folder. WooCommerce tables will be added soon. You can use both the powerful Query Builder and Eloquent to interact with these tables.
Eloquent:
(new \FalconBaseServices\Model\Post())->published()->with('author')->get();
If you want to use a new table as a model, create its class by extending the FalconBaseServices\Model\BaseModel class. If the table does not use the default prefix, set $with_prefix to false:
protected$with_prefix = false;
The rules and usage of models and Query Builder/Eloquent are exactly like the Laravel documentation.
Template
By default, Blade is used as the template engine, which is slightly different in usage from the standard. Pay attention to the example:
falconTemplate()->setViewDir('path to dir')->setView('name of file without extension')
->share(['item' => 'value'])->render();
You can also use Twig. The class derived from the interface app/Services/TemplateEngine/Template.php is available in the path app/Services/TemplateEngine/Implements/Twig.php. Simply add Twig to the plugin via Composer and then edit the file app/Providers/TemplateServiceProvider.php.
The usage is similar to the above example.
Unpack ddb_beefweb-*.tar.xz to $HOME/.local/lib/deadbeef.
Alternatively if you use universal deadbeef-static_*.deb package you can install matching universal deb of beefweb:
$ sudo dpkg -i deadbeef-beefweb_*.deb
foobar2000
Open foo_beefweb-*.fb2k-component with foobar2000, you will be asked to install the plugin.
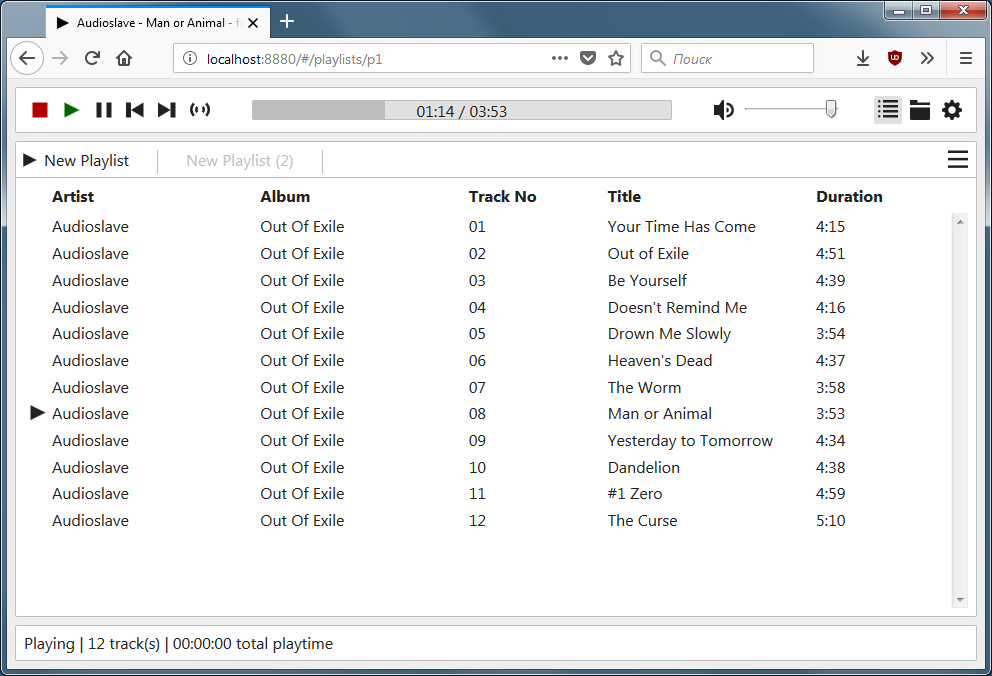
How to use
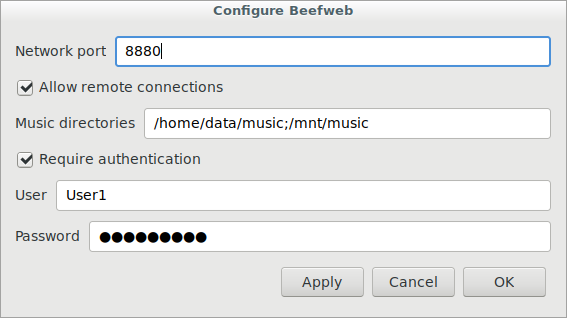
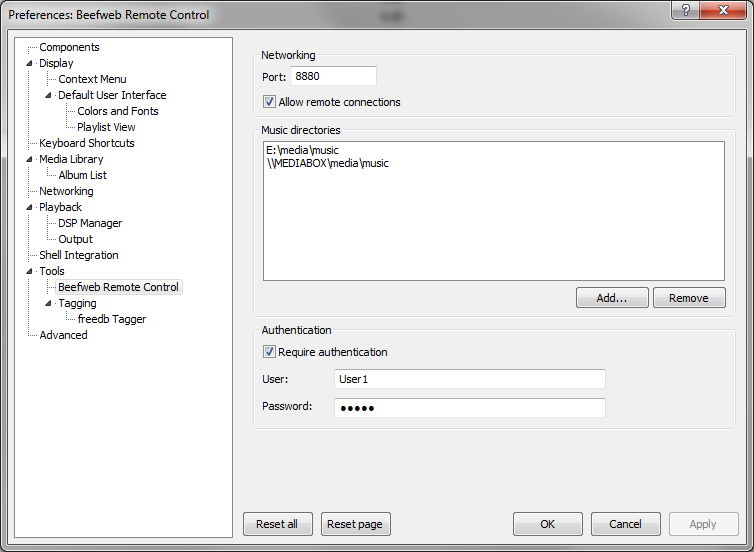
Point your browser to http://localhost:8880 and enjoy your web interface.
If you’ve enabled remote connections on plugin configuration screen
you’ll be able to connect from remote machines as well.
To allow browsing and adding files via web interface
specify music directories in plugin configuration screen.
For DeaDBeeF multiple music directories should be separated with ;.
01 novembre 2017
—- Voila les fichiers pour créer entièrement un serveur nginx avec une base de donnée mariadb et spip3 d’installé.
Pour l’utiliser:
récupérer les fichiers
récupérer (ou créer) le répertoire etc. Il contient les fichiers de configurations de mariadb et de nginx. Pour le serveur web, c’est une configuration minimal, mais qui fonctionne.
dans le même répertoire, créer un sous- répertoire maria (il contiendra la base de donnée -> modifiable dans le fichier docker-compose.yml
modifier les valeur:
MYSQL_ROOT_PASSWORD
MYSQL_USER
MYSQL_PASSWORD
SPIP_DB_PASS
SPIP_ADMIN_NAME
SPIP_ADMIN_LOGIN
SPIP_ADMIN_EMAIL
SPIP_ADMIN_PASS
Créer les container avec ./Redockerise.sh (c’est un petit script qui évite de tout retaper à la main)
Si tout c’est bien passé, vous pouvez lancer le tout avec “docker-compose up”
Base de donnée avec SPIP: dans le panneau de configuration, à la demande du type de base, indiquer mysql, et pour l’adresse de connexion, mettez 172.21.0.20.
Les containers sont configurés pour avoir toujours les même adresses ip:
php-fpm: 172.21.0.10
mariadb: 172.21.0.20
nginx: 172.21.0.30 (en intern, après, le port 80 est exposé sur 0.0.0.0)
Normalement, cela doit fonctionner.
26 octobre 2017
—- Apres un mois de travail, voila spip3 qui tourne avec mariadb / php-fpm / nginx